Hope you read and understood the usage of git commands discussed in my previous post. If not, read the post first before proceed further here. Let us discuss some more important git commands which are widely used in the projects.
11. git clone
This command is used to clone a repository from an existing URL/remote repository. Remote repository is nothing but github repository or bitbucket repository where your project files (including your team member files).
Assume that you are joining a new project and they have already created so many files and stored it in github. Now before you want to start your work, you have to download their project files to your local machine and start writing/modifying the files.
As you remember, we had created "GitDemo" working directory earlier. Let us go and see what are the files at this moment before cloning. You are seeing ".git and GitDemo.py" files.

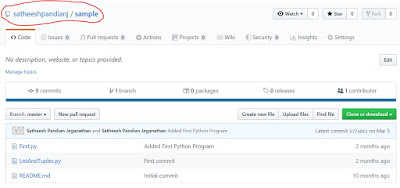
Now, I have created github repository called "sample" which can be considered as remote repository.
Let us clone the remote repository into our working directory by using "git clone <URL>"

Now let us go to working directory "GitDemo" and see what are the files available.

Now remote repository is cloned to your working directory. You can start making changes locally now.
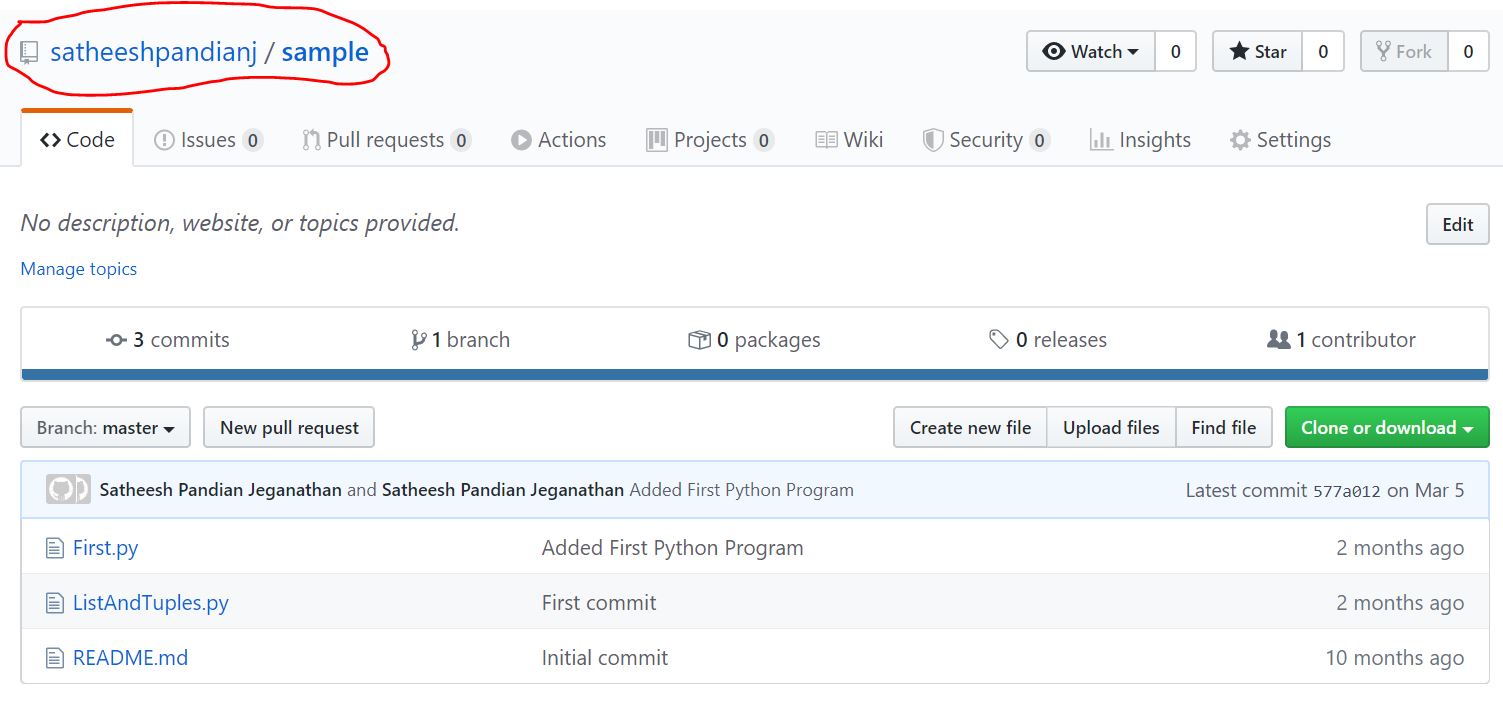
NOTE: To create remote repository, you need to create github account and create a new repository. Also, to find out the URL for repository, you need to open the repository and click on clone like below.

Golden rule in Git: Never work in master branch. Create your own branch and do all the changes in the file and then merge it with master branch.
12. git branch
This command is used to create a new branch. In my case, I navigated to "sample" folder which is my new working directory and create a branch here to make changes in the files available in sample folder (which was cloned from remote repository).
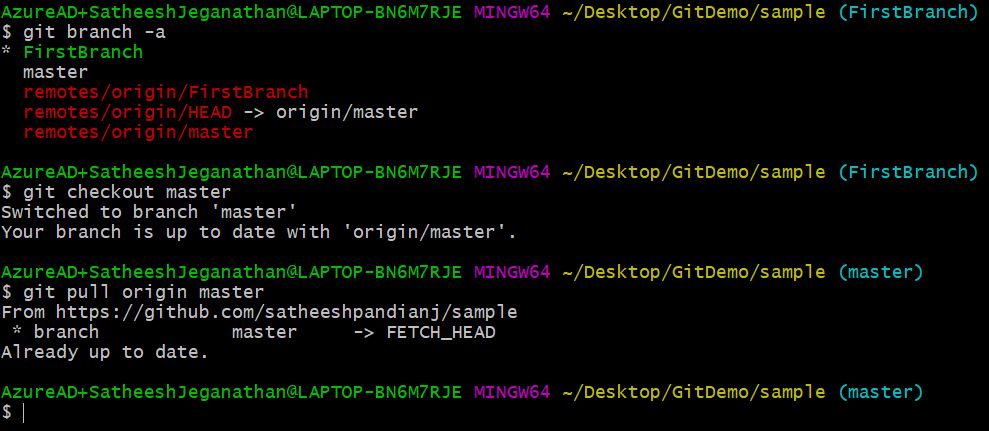
Before creating branch, I would like to know what branch it is currently in. To do so, I am executing the command "git branch -a" which shows all the branches in the current working directory.

As shown above, my current branch is master (current branch is always highlighted in green color with * symbol).
Let us create a new branch called "FirstBranch" using the command "git branch FirstBranch"

Now, you can see FirstBranch is created. However, current branch is still master, not FirstBranch. So, we need to change current branch to FirstBranch and start modifying/writing the changes in the directory.
13. git checkout
This command is used to switch from one branch to another. In my case, I wanted to switch from master to FirstBranch.

Now you can see the current branch is FirstBranch. You are all set to go for updating the files.
Let us modify a file called "First.py" and then will push the changes to local&remote repository. Before modifying the file "First.py" looks like below

I made some changes in the file and now it looks like

Now, you need to run git add, git commit commands to make sure the changes happen in staging area and committed files area.

14. git push
You made changes and committed in your branch(FirstBranch) at your local repository. But remember, your changes are not implemented in your local master branch (master) and your remote master branch (which is in github). To do so, you have to follow some sets of commands. The very first one is "git push". Execute the following command "git push -u origin <branch name>"

Now list out the branches in your local & remote repository.

Remote repository in github looks like below (2 branches - FirstBranch & master)

15. git pull
This command will retrieve all the files from the master branch of remote repository to your local repository. As many people working on the same master files, we need to make sure that the latest changes are retrieved to your local repository from remote before you merge the changes what you made so far. To do so, we are using "git pull" command.

16. git merge
This command is used to merge the specified branch’s history into the current branch.
First step in merging is your current Branch (FirstBranch) to your local master branch(master). Then your local master branch will be pushed to your remote repository master branch (github master branch)
To do the above statement, you should switch your current branch from FirstBranch to master. Then make sure your master branch is up to date like remote repository.
Now, let us merge the changes with master branch.

Now your master branch in local repository has the modified files (First.py). You can push the changes to your remote repository in github.

Now you connect your remote repository (github) and check master branch. You will be able to see the changes made in First.py file


Now, we have done our changes and pushed it to your remote repository. Hence, we can delete the branches from local and remote repository. Let us list out the branches available now.

Now let us delete branch we created "FirstBranch" in local repository first.

Now let us delete branch we created "FirstBranch" in remote repository.


That's all. Simple, Isn't it? 😀.
Note, there are many more commands in git. But, they are not used very frequently.


